Designing Custom Puffer Jackets for Brands
- Share
- Issue Time
- Aug 23,2026
Summary
Designing custom puffer jackets for brands: silhouette, fit and length, quilting patterns and baffle construction, shell fabrics, filling selection, hardware and pockets, branding, tech pack basics, cost impact of design choices, sampling and approval, plus FAQs for OEM and ODM programs.
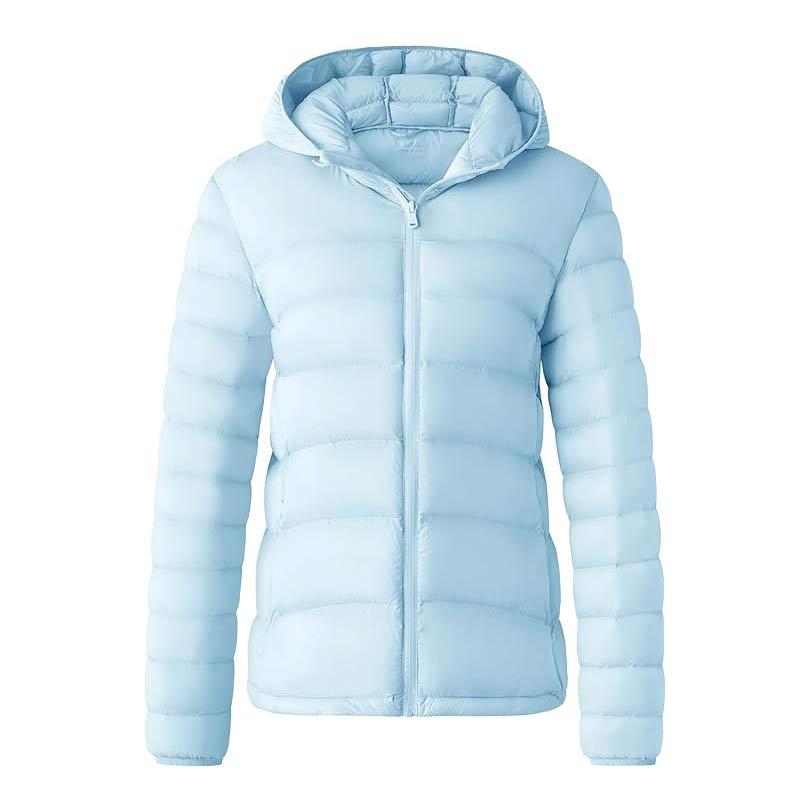
Designing a custom puffer jacket for your brand means turning a product idea into a manufacturable specification that a factory can quote, sample, and produce at scale. The process covers silhouette and fit, quilting patterns, baffle construction, shell fabrics, filling selection, hardware, branding, and a complete tech pack, all coordinated through sampling before bulk production. This guide walks through each design decision in the order your factory will need it, explains the trade-offs behind every choice, and shows how a custom puffer jacket manufacturer like GINWENWEAR supports brands from the first sketch to delivered stock. Every custom puffer jacket design starts with three decisions: silhouette, fit, and length. The silhouette defines the overall shape, whether that is a classic boxy puffer, a slim urban cut, an oversized streetwear profile, or a technical alpine shape. The fit describes how the garment sits on the body, from a relaxed fit that layers over knitwear to a performance fit that hugs the torso. The length determines whether you are designing a hip-length jacket, a longline coat, or a cropped piece. These three choices set the pattern foundation, and every other design element must work within them. It is important to understand how each choice affects manufacturing. Boxy and oversized silhouettes use more fabric per garment and often require more filling to hold their volume, which raises both material cost and shipping cost. Slim fits use less material but demand tighter tolerances in pattern making and sewing, because there is less room for error. Longline jackets require more baffle rows and longer zippers, which add both cost and production time. Your factory can advise on the cost implications of each silhouette, but the creative direction should come from your brand positioning and your target customer. Fit is also a market-specific decision. European and North American sizing systems differ in grading increments, and what reads as a relaxed fit in one market can feel oversized in another. When you brief a factory, specify the target market and provide a reference garment if you have one. A physical fit sample that your team can try on is worth more than any written size chart, and it should always be part of the development process for a custom puffer jacket. Quilting is the visual signature of a puffer jacket, and it is also a structural decision. The quilting pattern determines how the shell, filling, and lining are held together, and it directly affects warmth, drape, and production cost. Horizontal quilting is the classic puffer look and the most economical to produce. Vertical quilting creates a slimming effect and is common in urban styles. Diamond quilting adds a premium, heritage feel but requires more cutting precision and slightly more fabric waste. Checkerboard and custom geometric quilting are used for statement designs and usually carry a development surcharge. The second structural question is how the filling is contained. Baffle construction uses internal fabric walls that connect the shell and lining, creating separate chambers that keep down from shifting. This is the standard for high-performance down jackets because it maximizes loft and prevents cold spots, but it is more labor-intensive and slower to sew. Sewn-through construction stitches the shell and lining directly together through the filling, creating quilting channels. It is faster and cheaper, and it works well for synthetic fills and lighter down weights, but the stitching compresses the insulation and creates small cold spots at each seam. Your choice between baffles and sewn-through depends on the filling and the performance promise. If you are using 650-fill-power down or higher and promising serious warmth, baffle construction is the right call. If you are building a fashion puffer with synthetic fill for mild weather, sewn-through construction delivers the look at a better price. Many brands use sewn-through for value lines and baffle construction for their premium technical pieces, so both methods can coexist in one product range. The shell fabric is the first thing a customer touches and the main defense against wind, water, and abrasion. Most puffer jackets use woven nylon or polyester shells, and the specification typically includes the denier, the weave, the finish, and the weight. Denier describes the thickness of the yarn; a 20D shell is very light and soft, a 40D shell balances weight and durability, and a 70D shell is rugged and abrasion-resistant. The weave affects the hand feel and the drape, with ripstop weaves adding a grid reinforcement that stops small tears from spreading. Finishes do most of the functional work. A durable water repellent (DWR) finish makes the shell shed light rain and snow, which is standard on almost every puffer jacket sold in wet climates. A waterproof membrane or coating, such as a laminated PU or TPU layer, turns the shell into a fully waterproof barrier, but it adds cost, weight, and stiffness, and it reduces breathability. For most fashion and urban puffers, a DWR finish on a 20D to 40D shell is the sensible choice; full waterproofing is reserved for technical outdoor lines where wet-weather performance is the core promise. Fabric choice also interacts with the filling. Down needs a tightly woven shell to prevent feathers from poking through, which is why down-proof shells typically have a higher thread count or a down-proof coating. Synthetic fill is more forgiving, but a very light shell can still show the fill texture. When you select a shell, ask the factory for a test panel with the actual filling behind it, so you can see the real hand feel, drape, and any show-through before you commit. Filling selection is where the design meets the performance story. Down delivers the best warmth-to-weight ratio and the most compressible packability, which makes it the default for premium and technical puffer jackets. Synthetic polyester fill performs better when wet, costs less, and is simpler to certify, which makes it the default for value lines, rain-prone markets, and brands that want to avoid down sourcing complexity. The two can also be combined in one garment, with down in the core and synthetic in the hood or collar, though this is less common and adds complexity to the spec. Three numbers define a down filling: fill power, fill weight, and the down-to-feather ratio. Fill power measures the loft quality of the down, typically ranging from 550 to 900 cubic inches per ounce. Fill weight is the total grams of down in the garment. The down-to-feather ratio, usually written like 90/10, describes the proportion of down clusters to feathers. For a first custom puffer jacket, most brands start with 90/10 duck down at 650 to 700 fill power, which delivers a strong warmth story at a manageable cost. Synthetic fills are specified by gram weight per square meter, with 60 to 120 gsm covering most fashion and mid-weight applications. If you plan to sell through retail channels in Europe or North America, certified down matters. RDS certification confirms ethical sourcing with full traceability, and OEKO-TEX Standard 100 confirms that the filling and all textiles are free from harmful substances. Both are realistic requirements for modern retail programs, so confirm the certification chain with your factory early in the design process rather than discovering the gap after sampling. Every design choice carries a measurable effect on the unit cost of a custom puffer jacket, and understanding these effects early helps you allocate your budget where it matters. The table below summarizes the main cost drivers and how each decision moves your price. The general pattern is that anything that adds pattern pieces, sewing time, material volume, or premium components raises cost, while simplification lowers it. A useful exercise is to design two versions of the same jacket: a target version that matches your retail price, and a premium version that shows what the next price tier would buy. Comparing the two on paper clarifies which features your customers actually pay for and which are nice-to-haves you can defer to a later season. Your factory's quotation sheet will break down fabric, filling, hardware, labor, and trims, so you can see exactly where each dollar goes and negotiate or adjust with real information. Hardware turns a puffer jacket design from a shell into a finished product, and it is one of the most under-planned areas in custom development. The main zipper is the most important piece: YKK is the industry standard, but you must choose the size, the slider type, whether it is two-way for longer styles, and whether you want a water-resistant zipper for technical lines. Pocket zippers need to match or complement the main zipper, and snaps, buttons, and cord stops all carry their own sourcing lead times and minimums. Pocket configuration is a key design decision because it affects both function and cost. Standard puffer jackets carry two hand pockets, but you can add chest pockets, interior media pockets, zippered security pockets, or cargo-style flap pockets. Every pocket adds pattern pieces, sewing time, and hardware. Consider the garment's job: a commuter jacket needs secure interior pockets for phone and wallet, while a fashion piece may sacrifice pockets entirely for a clean silhouette. Interior features like a media pocket with headphone port, a key loop, or an inner hanging loop are low-cost additions that improve perceived quality. Hoods, cuffs, and hems also need specification. A detachable hood adds versatility but requires a zipper or snap system and increases cost. Fixed hoods are simpler but less flexible. Knitted cuffs improve warmth retention at the wrist, while adjustable cuffs with Velcro or snaps offer a more technical look. The hem can be straight, droptail, or fitted with a drawcord, and the drawcord system itself, including the cord type, the stops, and whether it is internal or external, is a detail that buyers notice and factories need specified. Custom branding is what makes a puffer jacket unmistakably yours. The brand touchpoints on a jacket are the woven label at the neck, the size label, a woven or printed brand flag at the side seam, a main label on the front chest or sleeve, and any heat transfer or printed details. Woven labels are the most durable and premium option, while printed heat transfers suit sporty lines and reduce cost. Embroidery adds a raised, premium feel and is common for chest logos, but it must be placed carefully on quilted panels so the stitches do not fight the quilting pattern. Do not forget the non-garment branding: hang tags, neck cards, poly bags, and cartons. Custom hang tags with your logo, product story, and care instructions improve the unboxing experience and support the perceived value of the product. The packaging spec should include the hang tag size and material, the barcode requirements for retail, and any sustainability requirements for your market, such as recycled poly bags or paper packaging. These items have their own production lead times, so include them in the development schedule rather than treating them as an afterthought. The tech pack is the single document that communicates your design to the factory, and its quality determines how fast and how accurately your sample comes back. A complete puffer jacket tech pack should include a flat sketch with front and back views, a detailed measurement spec with tolerances for every size, a bill of materials listing every fabric, filling, hardware, and trim item with quantities, a construction spec describing seams, stitches, and finishing methods, and the branding spec with label placement and artwork files. Colorways should be listed separately, and any special requirements like waterproof zippers or reflective details must be called out explicitly. You do not need a perfect tech pack to start, and that is an important point for first-time brands. A good factory will help you fill in the gaps. What you should bring is a clear design reference, a target market, a rough size range, and an honest target price. From there, the factory can propose the construction details, recommend fabrics and filling within your budget, and draft the measurements. Working iteratively with factory input is normal, and it produces a better result than sending an incomplete pack and waiting silently for a sample. Sampling is where the design becomes physical, and it is the best investment you can make in the success of the product. The development process at a full-service puffer jacket factory typically follows these stages: At GINWENWEAR, the sample development cycle is 7 to 14 days depending on complexity, with sample fees from $50 to $200 that are deductible from your bulk order. Once the sample is approved, bulk production takes 25 to 40 days, and our minimum order is 50 pieces per style. Payment terms are 30 percent deposit and 70 percent balance. This predictable schedule lets you plan a season launch with confidence. At GINWENWEAR the minimum order is 50 pieces per style. This keeps custom development accessible for emerging brands and capsule collections while remaining efficient for the factory. The sample development cycle is 7 to 14 days depending on the complexity of the design, the availability of materials, and the number of revisions. Sample fees range from $50 to $200 and are deductible from your bulk order. No. You need a clear design reference, target market, size range, and target price. A full-service factory will help draft the pattern, recommend materials, and build the measurement spec with you. Yes. Many brands supply their own shell fabric, filling, or branded hardware. We can work with customer-supplied materials or source from our verified partners, and we will test the combination before bulk production. GINWENWEAR holds ISO 9001, BSCI, RDS, and OEKO-TEX Standard 100 certifications. These cover quality management, social compliance, responsible down sourcing, and harmful-substance testing for the textiles we use. Send us your requirements with your design reference, target market, quantity, and budget. We typically respond within 24 hours with a development plan and quotation. Before you send your brief to a factory, run through this checklist to avoid the most common causes of slow sampling and unexpected cost. Confirm the target market and climate, because they determine fit, filling, and finishes. Fix the size range and decide whether you need extended or plus sizes, because grading affects the pattern from the start. Choose the silhouette, fit, and length in writing, with reference images attached. Select the quilting pattern and construction type, and understand whether you are buying baffle or sewn-through. Specify the shell fabric with denier, weave, finish, and any waterproof requirement. Decide the filling and write down the exact parameters, whether that is 90/10 down at 700 fill power or 80 gsm synthetic. List every pocket, hood, cuff, and closure detail. Define branding and packaging. Finally, state your target price and target delivery date, because both shape the factory's recommendations. A brief that covers these ten points in one document will produce a faster quotation, a cleaner sample, and fewer revision rounds than a sketch and a vague email. Designing a custom puffer jacket is a structured process that rewards preparation. Define the silhouette, fit, quilting, fabric, filling, hardware, and branding early, document everything in a complete tech pack, and validate the design through a physical sample before committing to bulk production. A factory with real puffer jacket experience, like GINWENWEAR, can guide you through each decision and flag cost and performance trade-offs before they become problems. Ready to design your puffer jacket? Contact our team or submit your requirements for a free consultation. You can also browse our product catalog or read more manufacturing guides on our blog.Designing Custom Puffer Jackets for Brands
Table of Contents
Design Basics: Silhouette, Fit, and Length
Quilting Patterns and Baffle Construction
Shell Fabrics for Custom Puffer Jackets
Choosing the Filling for Your Design
Design Decisions and Their Cost Impact
Design Element Budget Option Premium Option Main Cost Driver Silhouette Standard boxy fit Oversized or longline Fabric volume and fill weight Construction Sewn-through quilting Baffle chambers Labor time per garment Shell fabric 40D polyester, DWR 20D nylon ripstop, waterproof laminate Fabric cost per meter Filling Synthetic 80 gsm 90/10 down 700 fill power Raw material cost and certification Zipper Standard coil zip Two-way water-resistant zip Hardware unit price Pockets Two hand pockets Multi-pocket with interior features Pattern pieces and sewing steps Branding Printed heat transfer Embroidered logo, woven labels Decoration method and placement Hardware, Pockets, and Functional Details
Branding: Labels, Embroidery, and Packaging
Building the Tech Pack
From Design to Approved Sample
Frequently Asked Questions
What is the minimum order for a custom puffer jacket?
How long does sampling take?
Do I need a complete tech pack to start?
Can I use my own fabric or filling?
What certifications does the factory hold?
How do I start designing my puffer jacket?
A Practical Design Checklist Before You Send the Brief